Discover our
resources
Equipment:
- 1 robot minimum
- 1 computer/robot
- Small arena with obstacles
Strengths:
- Easy
- Only two sensors used: it becomes possible to interpret the connections observed in the neural network and explain the latter.
Duration :
60 to 90 minutes
Age :
Ages 8 and up
Configuration:
The PDF resource details the steps for configuring the settings.
The autonomous car
The "Autonomous Car" activity appears in this introductory video to Thymio AI.
Recommended for deepening supervised learning
Teach your robot to perform specific tasks with supervised learning. This last activity brings together everything seen in the last supervised learning activities. It combines obstacle detection, U-turns and line following.
Equipment set-up
An example route is given in Appendix 1. The walls are the size of an A4 sheet folded lengthwise into 4.
Walls can be created inexpensively with A4 sheets and a roll of tape.
Long wall: fold an A4 sheet lengthwise 3 times. Flatten it and glue the 2 opposite sides with a piece of adhesive, then give it back its 3D volume (bar shape). The dimensions are 297 x 52 x 52 mm.
If a wall section doesn't stay square, it can be reinforced by sliding another wall in at right angles.
Short wall: Simply cut a long wall when it is flattened.145 x 52 x 52.
Theproposed layout uses 9 sheets: long wall and 3 sheets of short wall.
Avoid overly rough or bumpy floors.
The challenge
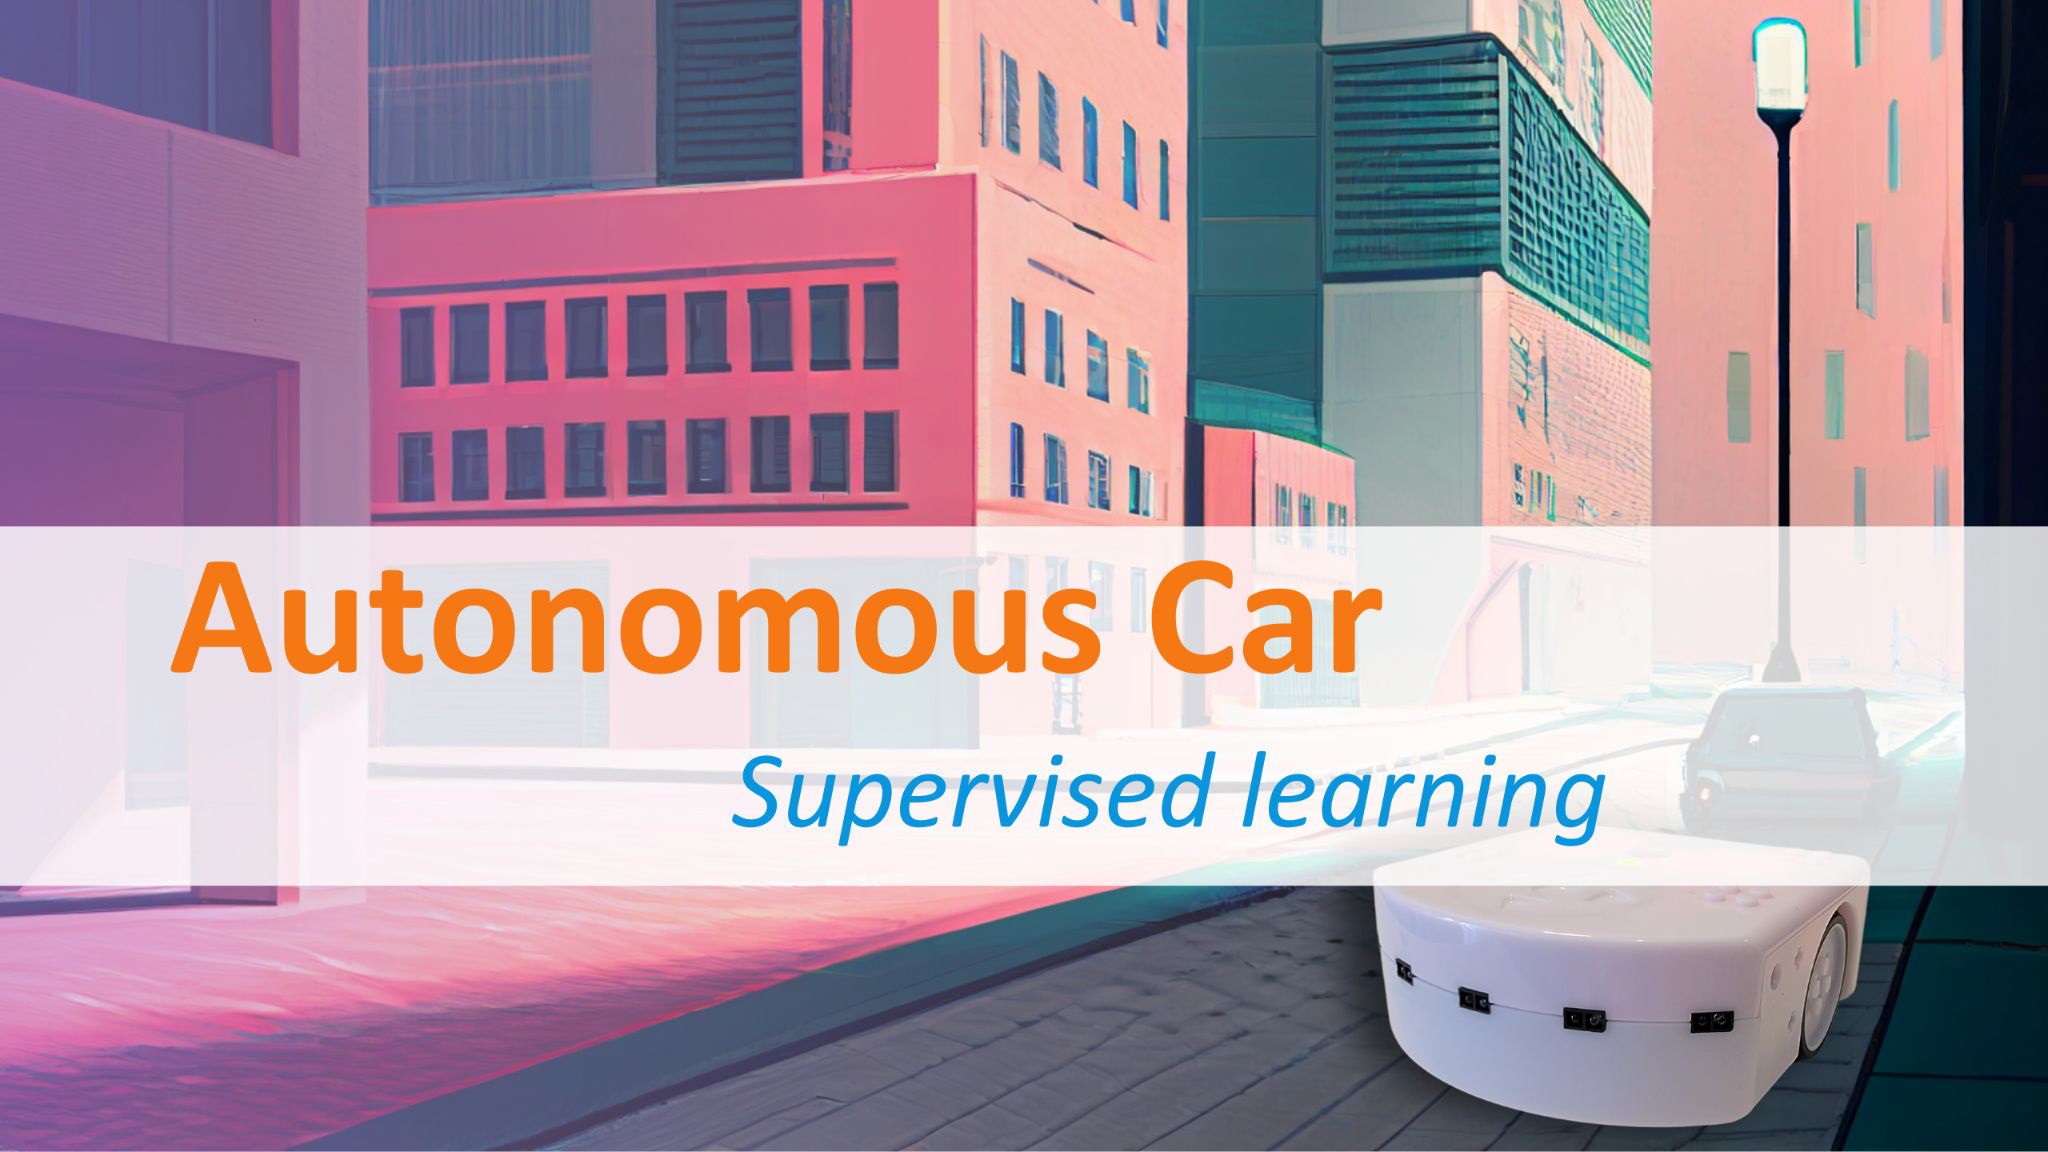
In this activity, Thymio takes on the role of an autonomous car traveling down a street.
The street is simulated by a series of parallel walls, forming a sinuous path. At the end of the street, a black line is placed perpendicular to the end walls.
The robot has to travel along the street without touching the walls. Once it reaches the end of the street, it turns around and travels in the opposite direction.
Possible enhancements: Pedestrian simulation. An obstacle up to 6 cm wide is placed in the middle of the street to simulate a pedestrian. Thymio must stop in front of it. The pedestrian is removed, Thymio restarts and continues its journey.
You can repeat the rules of the game presented in the activity: "Keeping track". If the latter activity has already been done as a game, the scores from the two activities can be combined.
Add pedestrian with or without pause
- 1st strategy
If all 3 central sensors pick up, stop. If only the central sensor picks up, stop.
Works well with a pedestrian, but stops in front of a wall.
- 2nd strategy
If the sensor in the center picks it up, stop.
Works well with a well-placed narrow pedestrian, better with a wall in front, but sometimes wrong.
AlphAI settings
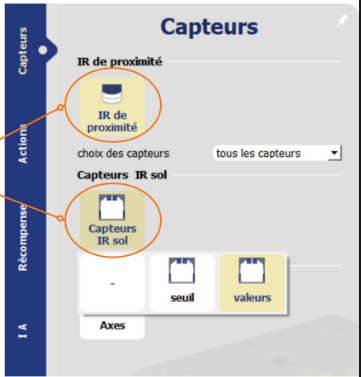
Sensors tab:
Proximity sensors and IR ground sensors will be used.
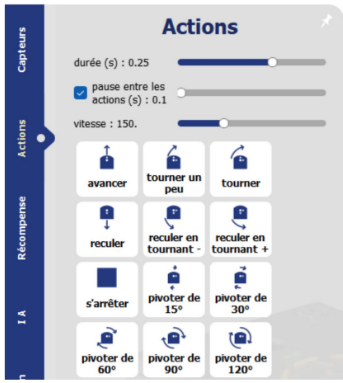
Actions tab:
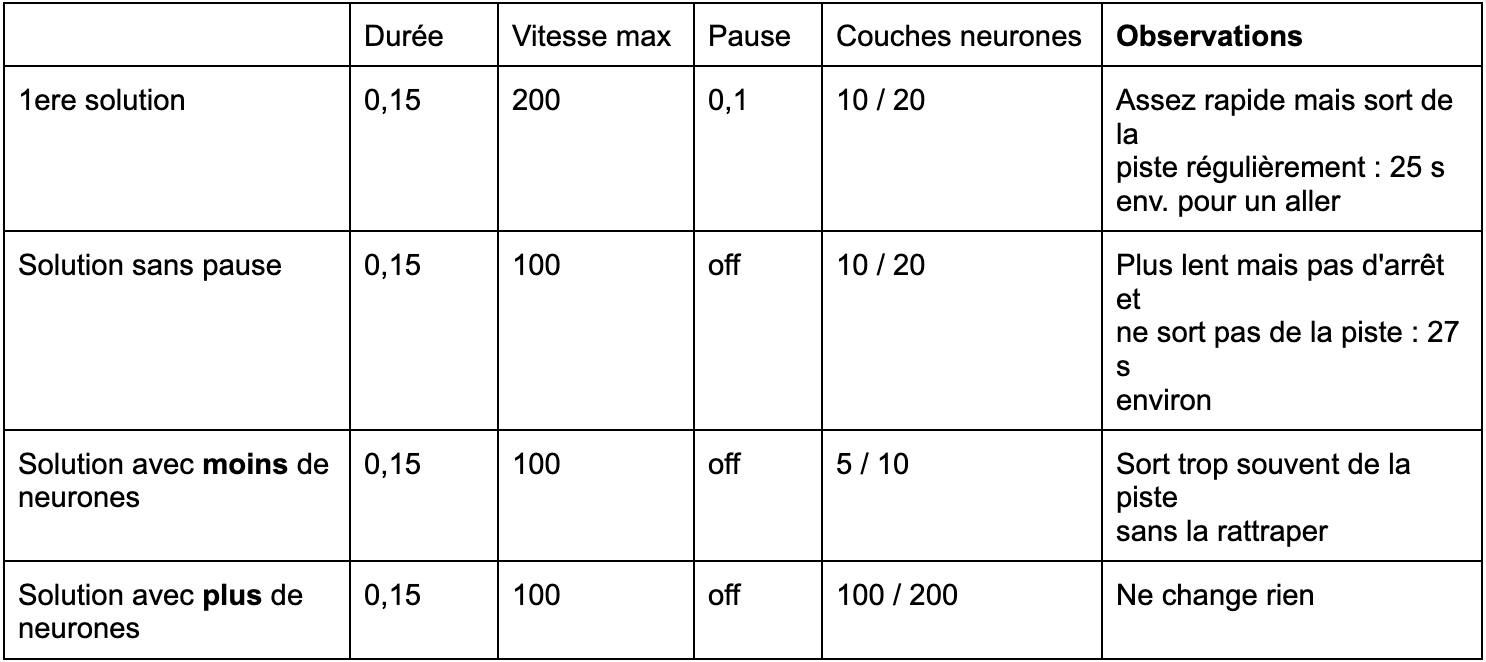
The team is free to choose the actions to be used. They can also set the duration, pause and maximum speed parameters as they wish (trial runs are recommended). These 3 parameters can be modified without having to repeat the learning process.
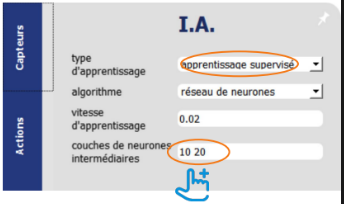
AI tab :
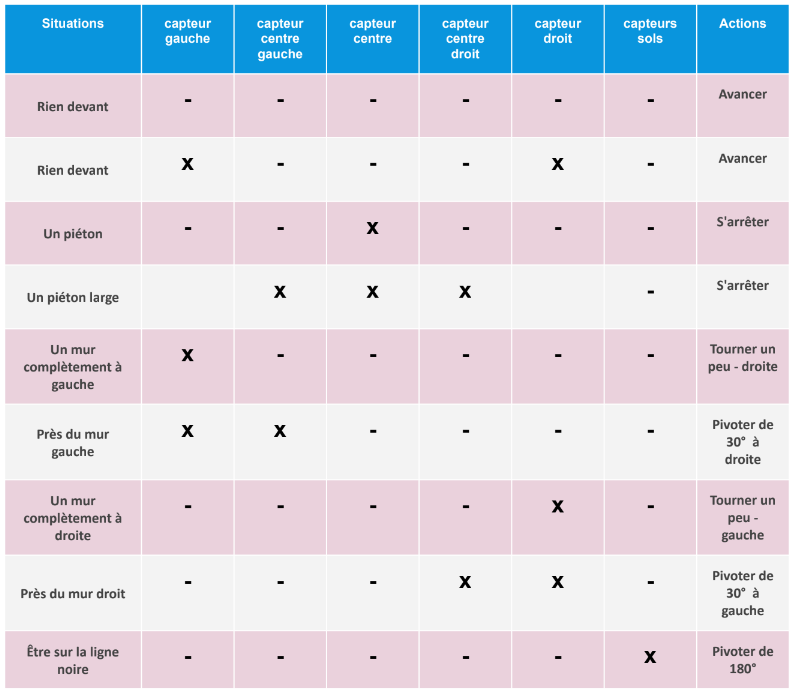
Leave the default choices supervised learning and neural network. Leave learning speed unchanged. Possibly decrease it if the robot often makes mistakes. Choose the 10-20 combination, i.e. 2 layers of neurons, one of 10 and the next of 20. It's up to you to carry out the learning process. Make sure you consider all possible cases, there aren't too many of them. You can save your settings in the menu Settings > Save settings ...
Appendices
Learning
Solutions
%402x.svg)

